Fontdue.js is the no-build way to put your store on a site you already run. You add two lines to your page – a stylesheet and a small script – and Fontdue exposes HTML custom elements like <fontdue-buy-button> and <fontdue-store-modal> that you drop into your markup. It works anywhere you can add custom HTML.
Pick your setup from the selector under the title – plain hand-written HTML, or a site builder like Webflow or WordPress – and the steps below adapt to where each one keeps its custom-code and embed settings. The shape is the same everywhere – load Fontdue.js once, add the Store ModalStore modalThe embeddable cart and checkout experience. A single component that handles browsing, license selection, and payment. , drop in a Buy Button, and allow your site’s origin. For a React or Next.js site, the components ship as an npm package instead – see the developer guide.
This is the hand-coded path: you edit your site’s HTML directly, with no site-builder UI between you and the markup – so the snippet goes in your page <head> and the elements go wherever you want them. While developing, serve the site over a local http:// origin rather than opening the file directly.11Opening an HTML file as file://… won’t work – cross-origin requests need an http:// origin. Run a local server with npx serve or python3 -m http.server, then open the http://localhost:… URL it prints.
Webflow is a visual design tool with fine-grained control over layout. This guide follows a minimal example project at fontdue-webflow-example.webflow.io.
Lay Theme is a grid-based WYSIWYG editor for WordPress that needs no code to build a site – but the same ideas carry to other WordPress themes. Follow the Lay Theme installation guide to get WordPress and Lay Theme running, then come back here. This guide follows a demo site at fontdue-laytheme-demo.onrender.com.
Semplice is a portfolio builder for WordPress. Set up your Semplice site first (first steps), then come back here. The remaining steps refer to the Semplice admin panel, so click Launch Semplice. This guide follows a demo site at fontdue-semplice-demo.onrender.com.
Cargo is a template-based site builder popular with designers. These steps follow current Cargo (Cargo 3); start a new site from a Blank template under Templates → Blank Templates. (Older sites, marked Cargo 2 in your dashboard, use a different editor.)
Framer is a no-code website builder with a visual design canvas, similar to Figma.
What the snippet does
The snippet is a stylesheet and a small script. The stylesheet carries the default styles for every Fontdue component. The script imports the fontdue runtime from the CDN at js.fontdue.com and calls initialize(), which scans the page for <fontdue-*> elements, mounts each one, and starts tracking cart state.
fontdue.initialize() accepts a config object that tunes component behavior – type tester defaults, Store Modal layout, Stripe styling, and more. See Customize your components for the overview and Configuration for the full field list.
Add Fontdue.js to your site
Paste the snippet into your site’s custom-code area, then add the Store Modal so the cart and checkout are reachable from every page. You call fontdue.initialize() once – it mounts every <fontdue-*> element on the page and keeps watching for any added afterward, so the components keep working as visitors move around your site.22The runtime mounts elements as they enter the page and removes them as they leave, so a single-page-app navigation that swaps in fresh markup just works – there’s nothing to re-initialize. Replace the url with your Fontdue site’s URL, in the form https://your-site.fontdue.com.
Paste both into your page <head>. If your site is more than one page, put them in a shared template or include so they load everywhere.
Open Site settings (via the menu icon, top left), find the Custom code tab, and paste both into the Footer code section.33Custom code requires a paid Webflow plan – at least the Basic site plan; free Starter sites can’t add custom code.
In the WordPress admin, go to Lay Options → Custom CSS & HTML and paste both into the Custom HTML at bottom field, then click Save Changes.
Semplice has no global field for body markup, so the script goes in the page <head> and adds the Store Modal itself.44Semplice’s only global custom-code field is the page <head>, which can’t hold body markup. Its one site-wide element slot is the global footer – but that drops out on any page with a custom or disabled footer, and cover and home pages often have no footer at all, so appending the Store Modal from the script is what guarantees it’s on every page. Go to Settings → General → HTML Head and paste this:
In the editor, open Site Settings (the tools icon in the right-hand toolbar) and choose CSS / HTML. Paste both into the HTML tab, then click Update.
Open Site Settings (the Framer logo, top-left → Settings) and choose the Code tab. Click Add, set Placement to Start of <head>, and paste the snippet.55Framer’s dialog suggests End of <body> for scripts – you can ignore that here; the module script mounts your components from either placement. Then add a second entry for the Store Modal element, with its placement set to End of <body>.
<link rel="stylesheet" href="https://js.fontdue.com/fontdue.css">
<script type="module">
  import fontdue from "https://js.fontdue.com/fontdue.esm.js";

  fontdue.initialize({
    url: "https://your-site.fontdue.com",
  });
</script>
Add the Store Modal element once, so the cart and checkout are reachable from every page:
<fontdue-store-modal></fontdue-store-modal>
<link rel="stylesheet" href="https://js.fontdue.com/fontdue.css">
<script type="module">
  import fontdue from "https://js.fontdue.com/fontdue.esm.js";

  fontdue.initialize({
    url: "https://your-site.fontdue.com",
  });

  if (!document.querySelector("fontdue-store-modal")) {
    document.body.appendChild(document.createElement("fontdue-store-modal"));
  }
</script>
Every Fontdue component is an HTML custom element – <fontdue-{name}> with hyphenated attributes. The Components reference lists them all and what each one takes.
Add a Buy Button
The Buy Button opens the Store Modal for a single font collection. Add it wherever you want a purchase entry point.
Drop the element straight into your markup where you want the button to appear.
Add a Code Embed element where you want the button, and paste in the code. A Fontdue element renders nothing until Fontdue.js runs on the published site, so it won’t show in Webflow’s Designer canvas and can be hard to find again – use the Navigator panel to locate and edit it.66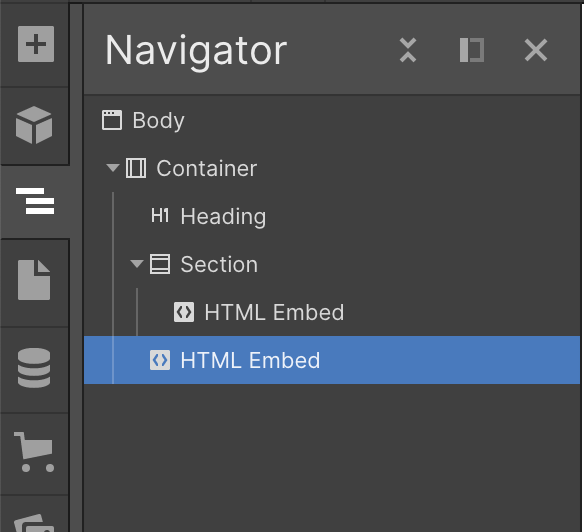
On a project page, open the Gridder’s +More menu and choose HTML, then paste in the code.77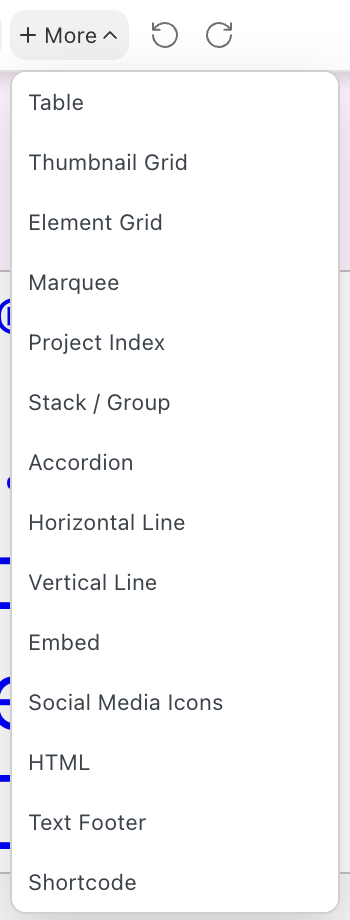
Open Modules, drag the Code module onto the page, and paste in the code. When you preview the page, clicking the button opens the Store Modal for that collection.
On the page where you want the button, open Code View (the </> icon in the top toolbar), add the code to the page’s HTML, and click Update.
Click Insert (the plus icon), find Embed under Utility, and add it. Select it, set its Type to HTML in the properties panel, and paste in the code. The Embed drops in as a free, off-canvas layer – drag it into your page frame in the Layers panel so it publishes. Like Webflow, it won’t show on the design canvas, but it appears in Preview and on the published site.
<fontdue-buy-button collection-slug="ibm-plex" collection-name="IBM Plex"></fontdue-buy-button>
Replace ibm-plex with your collection’s slug88the Slug field on the collection’s Settings tab and IBM Plex with the name to show on the button. You can drop in other components the same way – a Type Testers block, for instance:
<fontdue-type-testers collection-slug="ibm-plex"></fontdue-type-testers>
Allow your site’s origin
Before Fontdue.js can fetch from your store, your site’s origin must be on Fontdue’s cross-origin allowlist – Settings → Integration → Cross-origin API access in the admin. Add your site’s published URL as an absolute origin with no trailing slash.
Add the origin your site is served from. For local development that’s your dev server’s http://localhost:… URL; in production it’s your live domain, e.g. https://your-foundry.com.
Click Publish to put your site online. Webflow gives it a *.webflow.io address (or your custom domain) – add that exact origin, e.g. https://your-site.webflow.io.
Add the domain your WordPress site is served from, starting with https:// and without a trailing slash.
Cargo serves your site at a *.cargo.site address – auto-assigned as a numeric subdomain like https://1234567.cargo.site, or your custom domain. Add that exact origin.
Publish your site. Framer gives it a *.framer.app address (or your custom domain) – add that exact origin, e.g. https://your-site.framer.app.
Open your site and click the Buy Button. The Store Modal should open showing the collection. To run a full purchase against Stripe test cards before going live, see Test mode.
Use your fonts as webfonts
Beyond the components, you can set your site’s own typography in your Fontdue-hosted webfonts. Each font family has a Webfonts tab in the admin with one <link> tag for the whole family. Add that tag once, then select any style the standard way – set font-family to the family name and pick the weight and slant with font-weight and font-style.99This shared-family selector is the ergonomic default. The tab also offers a full-name selector, where every style carries its own font-family like "IBM Plex Mono Bold" – handy when a family’s styles don’t map cleanly onto weight and style. Webfonts covers both.
Paste the family’s <link> from its Webfonts tab into your page <head>, then set font-family to the family name in your CSS, switching weight and slant with the standard font-weight and font-style:
<link href="https://fonts.fontdue.com/your-site/css/ibm-plex-mono" rel="stylesheet">
<style>
  body { font-family: "IBM Plex Mono"; }
  h1 { font-family: "IBM Plex Mono"; font-weight: 700; }
</style>
Webflow’s font menu can’t see your Fontdue webfonts, but custom code can. Paste the family’s <link> from its Webfonts tab into Custom code → Head code, then write CSS that uses it:
<link href="https://fonts.fontdue.com/your-site/css/ibm-plex-sans" rel="stylesheet">

<style>
  body {
    font-family: "IBM Plex Sans";
    font-weight: 400;
  }
</style>
Webflow lowercases class names into CSS selectors, so a Heading class becomes .heading – target it the same way, switching to the bold weight with the standard font-weight:
.heading {
  font-family: "IBM Plex Sans";
  font-weight: 700;
}
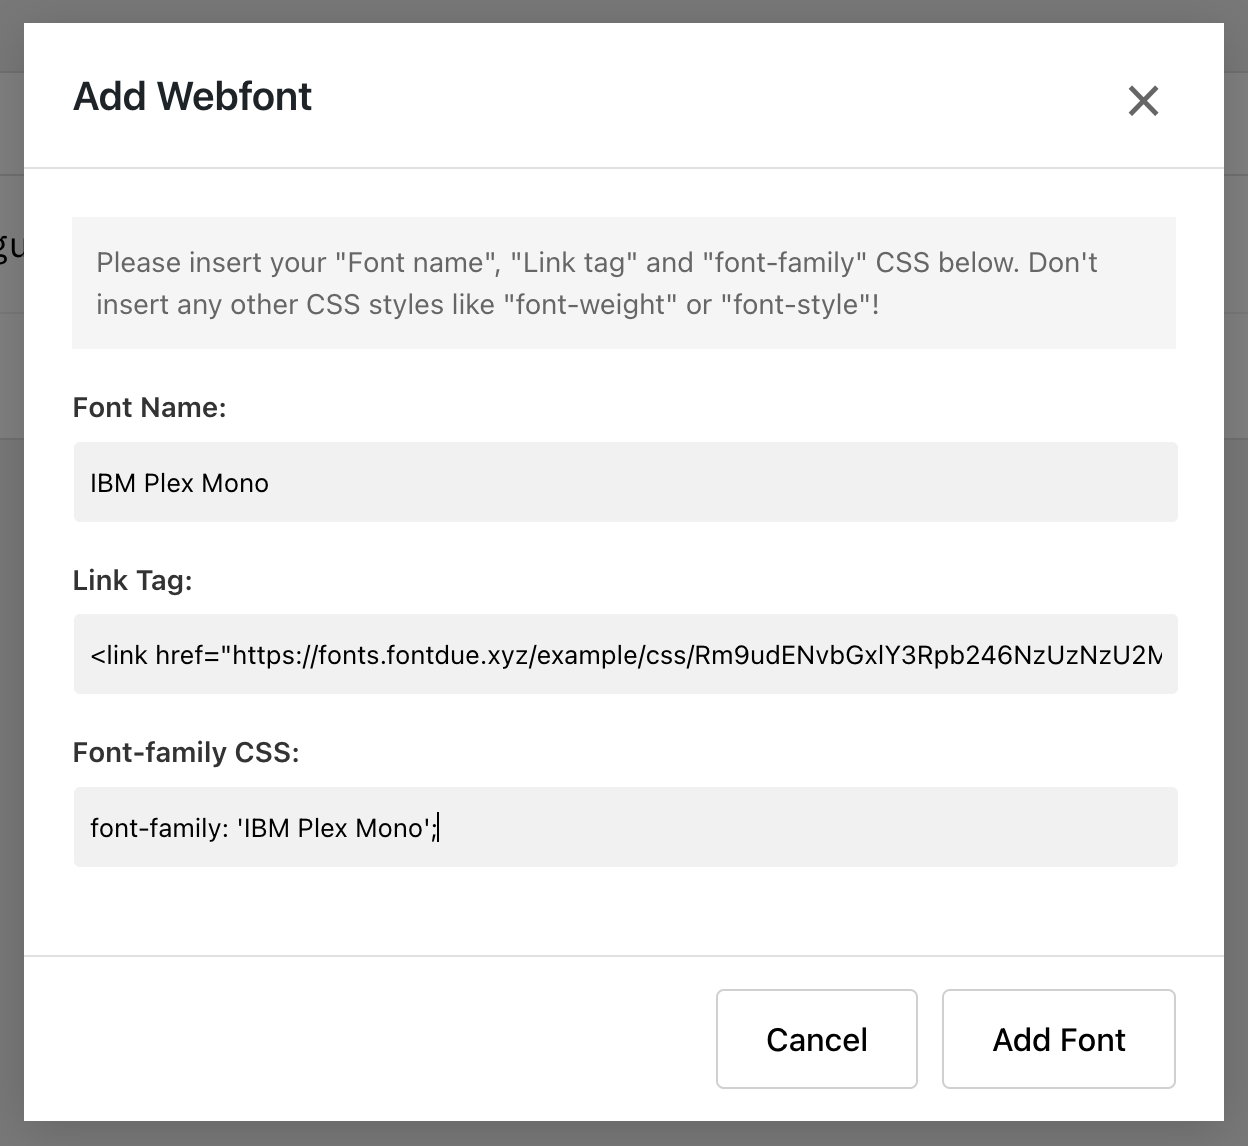
Lay Theme has a built-in webfont manager. In the WordPress admin, go to Lay Options → Webfonts and click + Add Font to open the Add Webfont dialog, then choose Add by <link> tag and CSS. Add one entry for the whole family – fill in Font Name, Link Tag, and Font-family CSS from the family’s Webfonts tab. In Font-family CSS use only the family name, with no font-weight or font-style – Lay Theme’s dialog warns against them, and you pick the weight in Text Formats below:
<link href="https://fonts.fontdue.com/your-site/css/ibm-plex-mono" rel="stylesheet">
font-family: 'IBM Plex Mono';
Click Add Font – the family is added to the Webfonts table, with a preview in the Test Sentence column. Then go to Text Formats in the WordPress menu, where it now appears in the Font Family menu. Each text format selects one weight: choose IBM Plex Mono and set Font Weight to Normal (400) for body text or Bold (700) for headings, and Lay Theme loads the matching face – so bold is the real Bold, not a synthesized one.1010The preview may not update until you click Save Changes. Text Formats is Lay Theme’s recommended way to organize your site’s typography.
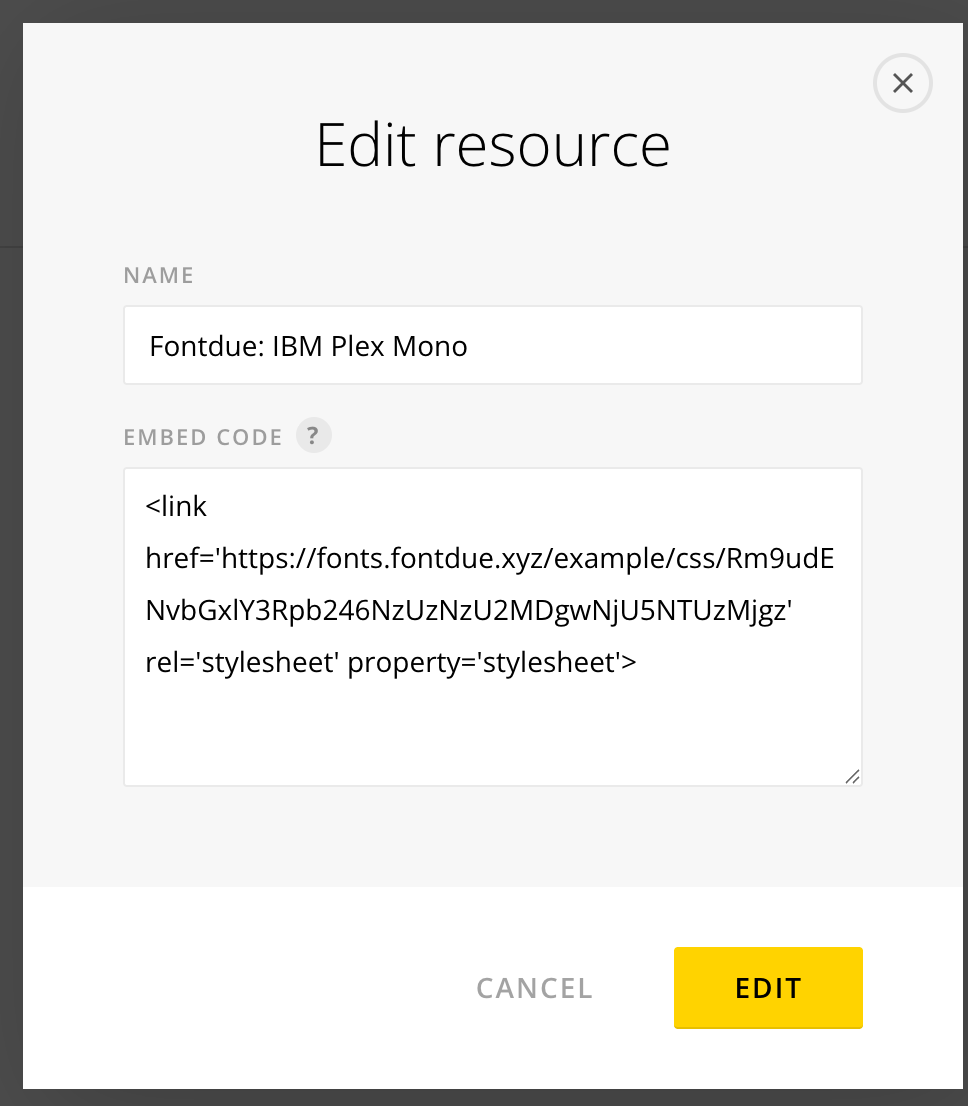
Semplice has a built-in webfont manager. Go to Customize → Webfonts → Add Resource and paste the embed code from the family’s Webfonts tab – one resource per family.
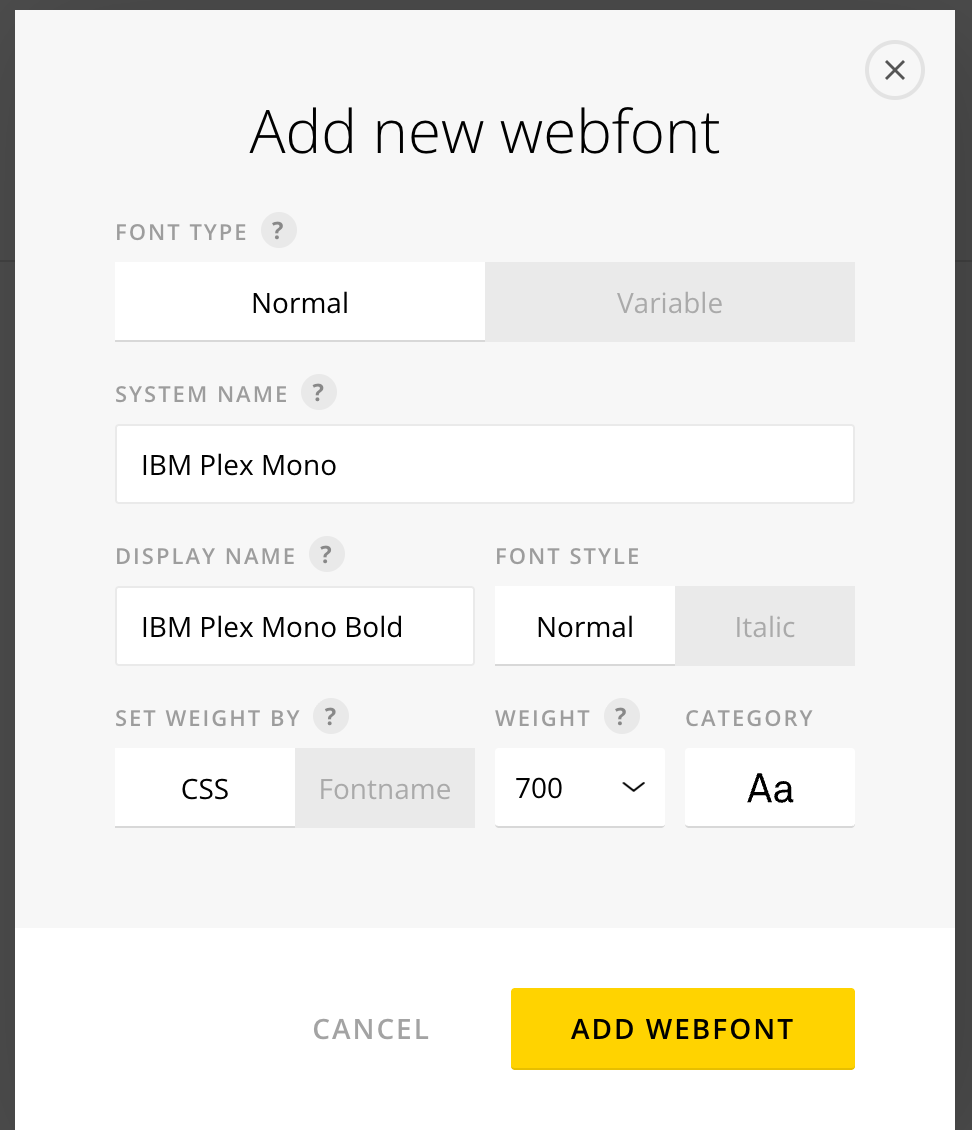
Then click Add Webfont once per weight you want to use. In the Add new webfont dialog, leave Set weight by on its default, CSS, and give every entry the same System Name – the family name, IBM Plex Mono – changing only the Weight (400 for Regular, 700 for Bold) and the Display Name that labels it. Entries that share a System Name become one family, and Semplice picks the matching face by weight.1111Display Name is what shows up in the Typography font picker, so keep it descriptive – IBM Plex Mono Regular, IBM Plex Mono Bold.
Once they’re loaded, go to Customize → Typography to choose them for your site.
Back in the Code tab, add the family’s <link> and a <style> block (placement Start of <head>) – set font-family to the family name and switch style with font-weight / font-style, matching the CSS on the family’s Webfonts tab:
<link href="https://fonts.fontdue.com/your-site/css/ibm-plex-mono" rel="stylesheet">
<style>
  body { font-family: "IBM Plex Mono"; }
</style>
In Site Settings → CSS / HTML, add the family’s <link> to the HTML tab (alongside the snippet), then in the CSS tab set font-family to the family name, switching style with font-weight / font-style to match the CSS on the family’s Webfonts tab:
<link href="https://fonts.fontdue.com/your-site/css/ibm-plex-mono" rel="stylesheet">
body { font-family: "IBM Plex Mono"; }
Components and your custom fonts
The components inherit your site’s font-family, so once you’ve set a default font they pick it up. A couple of site builders need a small nudge to make that – and the Character Viewer’s sticky behavior – work.
Set a default font for the page in Lay Options → Custom CSS & HTML, in the Custom CSS section’s CSS for Desktop field:
body {
  font-family: 'IBM Plex Mono', monospace;
}
The Character ViewerCharacter viewerInteractive glyph grid where visitors can browse every character in a font. ‘s active glyph sticks to the viewport as you scroll, but Lay Theme’s overflow styles prevent it. Override them in the same CSS for Desktop field, and nudge the sticky offset below Lay Theme’s top nav:
.lay-content,
.grid-inner {
  overflow: visible;
}

body {
  --character_viewer_sticky_top: 60px;
}
Semplice sets its own default font, so the components won’t inherit your webfont until you override it. Add this custom CSS in Customize → Advanced → Custom CSS (choose Global, then Edit Custom CSS), using one of the webfonts you loaded:
body {
  font-family: 'IBM Plex Mono', sans-serif;
}
The Character ViewerCharacter viewerInteractive glyph grid where visitors can browse every character in a font. ‘s active glyph sticks to the viewport as you scroll, but Semplice’s overflow styles prevent it. Fix it with custom CSS, adjusting the offset to clear your sticky nav:
.sections {
  overflow: visible;
}

body {
  --character_viewer_sticky_top: 100px;
}
Set a default font-family on your body (or whichever elements you’re styling) and the components follow.
Add a Cart Button to your navigation
A Cart Button shows the cart count and opens the Store Modal, and belongs in your site’s navigation.
Add it with an embed wherever your navigation accepts custom HTML:
<fontdue-cart-button button-style="icon"></fontdue-cart-button>
Lay Theme’s menu doesn’t take custom HTML, so add a placeholder menu item and fill it with the Cart Button. Create a menu item with the URL # and a non-breaking-space label, then – under Screen Options (top right) – enable CSS Classes and set the item’s class to cart-menu-item. In Lay Options → Custom CSS & HTML, add this to Custom HTML at bottom to populate it:
document.querySelectorAll('.cart-menu-item').forEach(function ($el) {
  $el.innerHTML = '<fontdue-cart-button button-style="icon"></fontdue-cart-button>';
});
Then match the menu’s styling in the CSS for Desktop field:
.cart-menu-item {
  font-size: 1rem;
  width: 26px;
  height: 26px;
}
Semplice’s navigation doesn’t take custom HTML, so add a placeholder menu item and fill it with the Cart Button. In Appearance → Menus, add a Custom Links item, set its link to /, and give it the class nav-cart (if the CSS Classes field isn’t shown, enable it under Screen Options at the top right). Then in Customize → Advanced → Custom Javascript, add:
function setNavCart() {
  document.querySelectorAll('.nav-cart').forEach(function (el) {
    el.innerHTML = '<fontdue-cart-button label="CART" button-style="icon"></fontdue-cart-button>';
  });
}
setNavCart();
There’s more to drop in – a Character Viewer, Type Testers, and the rest of the component library – each added the same way. When you’re ready to go public, Launch your site covers the move from private preview to a live store.
file://… won’t work – cross-origin requests need an http:// origin. Run a local server with npx serve or python3 -m http.server, then open the http://localhost:… URL it prints. ↩<head>, which can’t hold body markup. Its one site-wide element slot is the global footer – but that drops out on any page with a custom or disabled footer, and cover and home pages often have no footer at all, so appending the Store Modal from the script is what guarantees it’s on every page. ↩